分类: frontend

  • CodeMirror 的 MatchDecorator

    在使用 CodeMirror 编辑器时,Decoration.markMatchDecorator 是两种非常有用的工具,可以帮助我们为编辑器中的内容创建自定义标记。Decoration.mark 用于为指定内容添加类名或标签名,而 MatchDecorator 则基于正则表达式与 Decoration 为编辑内容生成 DecorationSet

    要使用 MatchDecorator,可以将其封装成一个 CodeMirror 扩展,如下所示:

    function matcher(decorator: MatchDecorator): Extension {
      return ViewPlugin.define(view => ({
        decorations: decorator.createDeco(view),
        update(u): void {
          this.decorations = decorator.updateDeco(u, this.decorations);
        },
      }), {
        decorations: v => v.decorations,
      });
    }

    下面是一个完整的示例,展示了如何为 ==mark== 语法创建自定义标记类型:

    import { Decoration, EditorView, MatchDecorator, ViewPlugin } from '@codemirror/view';
    import { Extension } from '@uiw/react-codemirror';
    
    function matcher(decorator: MatchDecorator): Extension {
      return ViewPlugin.define(view => ({
        decorations: decorator.createDeco(view),
        update(u): void {
          this.decorations = decorator.updateDeco(u, this.decorations);
        },
      }), {
        decorations: v => v.decorations,
      });
    }
    
    export const HighlightMark = Decoration.mark({
      class: 'md-highlight',
    });
    
    const mdMarkSyntaxMatcher = new MatchDecorator({
      regexp: /==[^=]+==/g,
      decoration: HighlightMark,
    });
    
    const mdMarkSyntaxStyling = matcher(mdMarkSyntaxMatcher);

    通过这种方式,我们可以轻松地为编辑器中的特定语法添加自定义样式,提升用户体验。

  • 跟 LLM 一起折腾 Web Audio

    最近在开发一个与 TTS(Text-to-Speech)相关的功能,其中需要对播放的人声音频进行加速或减速处理。这个领域我之前完全没有接触过,DeepSeek 推荐我使用 Howler.js 和 Tone.js 这样的库来播放音频。

    在实现加速功能时,我发现需要修改 playbackRate,但通常 playbackRate 和音调(Pitch)的修改是联动的。然而,Howler.js 并没有提供直接修改 Pitch 的方法。在折腾了很久之后,DeepSeek 也没能解决 Tone.js 带来的噪音问题。使用在线处理(Pitch Shift 效果器)时,会产生“dadadada”的噪音;而使用离线处理(GrainPlayer)时,又会出现类似回声的杂音。

    最终,我查到 HTML5 的 Audio Element 提供了 preservePitch 的功能,这似乎是一个比较理想的解决方案。

    一些经验总结

    1. 代码生成与抽象
      即使通过 LLM 生成代码的成本较低,也尽量让它生成易于拓展和复用的代码。在我的尝试中,即便切换了多个不同的音频库,我都不需要修改业务代码,这正是因为我在最初就让 LLM 对音频处理部分进行了足够的抽象。
    2. LLM 在处理开放性问题时的局限性
      如果待解决的开放性问题足够普遍,LLM 通常能给出令人满意的答案。但对于像 Web Audio 这样 API 复杂且不太常见的技术领域,LLM 可能就很难解决问题了。例如,在解决 Pitch Shift 效果器的噪音问题时,DeepSeek 很难坚定地指出 Tone.js 的实现本身就存在缺陷(事实上也是如此)。这大概率是因为 LLM 只是一个互联网文本预测器,容易产生“幻觉”,尤其是在处理小众领域的问题时。

    总结

    在开发过程中,抽象和代码复用是非常重要的,尤其是在处理新技术领域时。虽然 LLM 在很多常见问题上表现出色,但在处理复杂或小众领域的问题时,仍需要结合人工经验和深入的技术调研来找到更优的解决方案。

  • 如何为 CodeMirror Widget 添加 lint marker

    CodeMirror6 中可以创建 Atomic Rranges 用自定义 Widget 替换文本,从而实现更加丰富的展示效果。但是当文本被 Widget 替换后,lint 功能的 markClass 并不会被添加到生成的 Widget 元素上,这就会导致用户无法在 Widget 上看到 linter 生成的错误标记。

    CodeMirror 并没有提供直接地解决方案,我们需要自己将 lint 结果绑定到 Widget 上。由于 Widget 的渲染时机跟 linter 的运行时间都是黑盒,可以假设这俩都会在编辑器内容更新后被异步并发调用。为了方便将 linter 异步产生的结果同步给 Widget ,可以用 rxjs 的 BehaviorSubject 存储 linter 的结果。

    import { Diagnostic } from '@codemirror/lint';
    import { BehaviorSubject } from 'rxjs';
    
    const diagnostics$ = new BehaviorSubject<Diagnostic[]>([]);

    在实现 linter 时,除了直接返回 Diagnostic 外,还需要将结果写入 diagnostics$

    const invalidMetric = linter(async view => {
      const diagnostics: Diagnostic[] = await yourLinter(view);
      diagnostics$.next(diagnostics);
      return diagnostics;
    });

    接下来,我们在创建 Widget 时就可以订阅 Diagnostic 的变化来更新 UI 状态:

    class PlaceholderWidget extends WidgetType {
      constructor(string, private from: number, private to: number) {
        super();
      }
    
      toDOM(view: EditorView): HTMLElement {
        const span = document.createElement('span');
        span.innerHTML = renderYourWidget(view);
        // @ts-expect-error add destroy$ to span
        span.destory$ = diagnostics$.subscribe(diagnostics => {
          const error = diagnostics.find(d => d.from >= this.from && d.to <= this.to);
          if (error) {
            span.classList.add('cm-widget-error');
          } else {
            span.classList.remove('cm-widget-error');
          }
        });
        return span;
      }
    
      destroy(el: HTMLSpanElement) {
        // @ts-ignore
        if (el.destory$) {
          // @ts-ignore
          el.destory$.unsubscribe();
        }
      }
    }

    注意 PlaceholderWidget 的构造函数,我们需要在创建 Widget 的时候,传入 Widget 的插入位置(fromto)。

    const placeholderMatcher = new MatchDecorator({
      regexp: /#[0-9A-Za-z_]+/g,
      decorate: (add, from, to, match) => {
        const deco = Decoration.replace({
          widget: new PlaceholderWidget(from, to),
        });
        add(from, to, deco);
      },
    });
    const placeholders = ViewPlugin.fromClass(class {
      placeholders: DecorationSet;
    
      constructor(view: EditorView) {
        this.placeholders = placeholderMatcher.createDeco(view);
      }
    
      update(update: ViewUpdate) {
        this.placeholders = placeholderMatcher.updateDeco(update, this.placeholders);
      }
    }, {
      decorations: instance => instance.placeholders,
      provide: plugin => EditorView.atomicRanges.of(view => {
        return view.plugin(plugin)?.placeholders || Decoration.none;
      }),
    });

    最终的效果如下:

  • DRAFT: pre-bundle dependencies for vite

    背景

    如果我不想每次构建 SPA 的时,把项目的依赖也一并重新构建一遍,我应该怎么做?
    预打包项目依赖,当项目依赖长久没有发生变更时,不再重新 bundle node_modules。

    解决方案

    类似 Webpack DLL plugin,但是要更加智能。

    只预打包项目中多次使用的依赖包。
    同时支持 build/serve 两种模式。

    实现细节——预打包部分:

    用正则表达式找出项目中所有的 import 语句
    用单独的 vite config 配合 preBundle 插件为第三方包生成预打包文件

    实现细节——使用预打包文件:

    build 模式,这里涉及 rollup 相关的插件逻辑,需要让 rollup 将预打包的模块 id 解析为外部依赖,并且将预打包文件作为 prebuilt-chunk 输出。

    dev 模式,这里涉及 vite 跟 esbuild 相关的逻辑。
    由于我们并不会为所有的第三方依赖生成预打包文件,所以存在某些 optimizeDeps 模块引用预打包模块的情况。
    vite 会使用 esbuild optimize deps,所以需要配合 esbuild 插件处理。

    如何在导入方使用 commonjs 导出的 named export ?

    在预打包阶段, rollup 不会为 cjs entry 生成 named export,当我们在导入预打包文件时,需要对这些被转换成 esm 的 cjs 做一些额外处理。

    需要自己实现一个 transform hook:

    // input
    import { useState } from 'react';
    // ouput
    import React from 'react';
    const useState = React.useState;
    

    反思

    预打包多次使用的依赖会为每个依赖都创建一个 bundle 文件,这可能会让浏览器加载页面的时候需要发送更多的请求。

    但是考虑到这些预打包文件可能很少更新,浏览器本地缓存可以起到很好的效果。如果浏览器跟服务器之间使用的是 http2 协议,这些请求似乎也不太算是问题?
    如果要从根本上解决这个问题,还得靠 web bundle。

    实现 merged exports

    https://github.com/tc39/proposal-module-declarations?tab=readme-ov-file

    @ant-design/icons 中提供了很多 icons, 如果为每个 icon 都创建一个 prebundle chunk, 那么 output 目录中就会出现上千的小文件。

    要避免这种情况,需要实现合并 exports 的功能。

    // vite.config.mts
    
    plugins: [
      prebundleReference({
        merge: {
          '<ruleName>': ['<module-id-prefix>', '@ant-design/icons']
        }
      })
    ]
    

    以上的配置会在 transform 环节产生如下的代码:

    // pre-bundle-merged-<ruleName>.mjs
    import * as __at__ant_design_icons from '@ant-design/icons';
    import * as __at__ant_design_icons_Foo from '@ant-design/icons/Foo';
    export const __ns_at__ant_design_icons = __at__ant_design_icons;
    export const __ns_at__ant_design_icons_Foo = __at__ant_design_icons_Foo;
    

    对应的 manifest 部分

    [
      {
        "moduleId": "@ant-design/icons",
        "moduleFilePath": "pre-bundle-merged-<ruleName>.mjs",
        "exports": [
          "default",
          "__moduleExports"
        ],
        "exportAs": "__ns_at__ant_design_icons",
        "isCommonJS": false
      },
      {
        "moduleId": "@ant-design/icons/Foo",
        "moduleFilePath": "pre-bundle-merged-<ruleName>.mjs",
        "exports": [
          "default",
          "__moduleExports"
        ],
        "exportAs": "__ns_at__ant_design_icons_Foo",
        "isCommonJS": false
      },
    ]

    当在 reference 插件中使用时,需要转换 import 代码:

    // helper
    
    export function _prebundle_merge_get_default(moduleLike) {
      return moduleLike.default ?? moduleLike;
    }
    
    export function _prebundle_merge_get_named(moduleLike, name) {
      if(name in moduleLike){
        return moduleLike[name];
      }
      if(moduleLike.default && name in moduleLike.default) {
        return moduleLike.default[name];
      }
    }
    // default import
    import Foo from '@ant-design/icons/Foo';
    // =>
    import { __ns_at__ant_design_icons_Foo as __ns_at__ant_design_icons_Foo$1 } from '@ant-design/icons/Foo';
    const Foo = _prebundle_merge_get_default(__ns_at__ant_design_icons_Foo$1);
    
    
    // named import
    import { Foo } from '@ant-design/icons';
    // =>
    import { __ns_at__ant_design_icons_Foo as __ns_at__ant_design_icons_Foo$2 } from '@ant-design/icons/Foo';
    const Foo = _prebundle_merge_get_named(__ns_at__ant_design_icons_Foo$2, 'Foo');
    
    // ns import
    import * as Icons from '@ant-design/icons';
    // =>
    import { __ns_at__ant_design_icons_Foo as __ns_at__ant_design_icons_Foo$3 } from '@ant-design/icons/Foo';
    const Icons = __ns_at__ant_design_icons_Foo$3;

    prebundle merge transform 的逻辑应该在 commonjs 转换之后,因为 commonjs transform 假定 module 只会导出 { default: blabla }

    // input
    import {useCallback} from 'react';
    
    // transform commonjs
    import React from 'react';
    const useCallback = React.useCallback;
    
    // transform prebundle merge
    import { __ns_react as __ns_react$1 } from 'react';
    const React = _prebundle_merge_get_default(__ns_react$1);
    const useCallback = React.useCallback;

    好像也可以将 commonjs transform 跟 prebundle merge transform 合并?

    [
      {
        "moduleId": "react",
        "moduleFilePath": "pre-bundle-merged-<ruleName>.mjs",
        "exports": [
          "default"
        ],
        "exportAs": "default",
        "isCommonJS": true
      }
    ]
    import React, {useCallback} from 'react';
    
    // =>
    import { default as __ns_react$1 } from 'react';
    const React = _prebundle_merge_get_default(__ns_react$1);
    const useCallback = _prebundle_merge_get_named(__ns_react$1.'useCallback');

    接着,在 resolve 阶段,只需要将模块 id 都替换成 <path-to>/<moduleFilePath>

    预打包依赖项,真的可以提高构建效率吗?

    在我的项目中,第三方依赖的体积远大于实际的代码量,每次启动 dev server 或者构建 production artifacts,都需要消耗很多时间在转换 node_modules 代码上。预打包依赖就可以很好的解决这个问题。

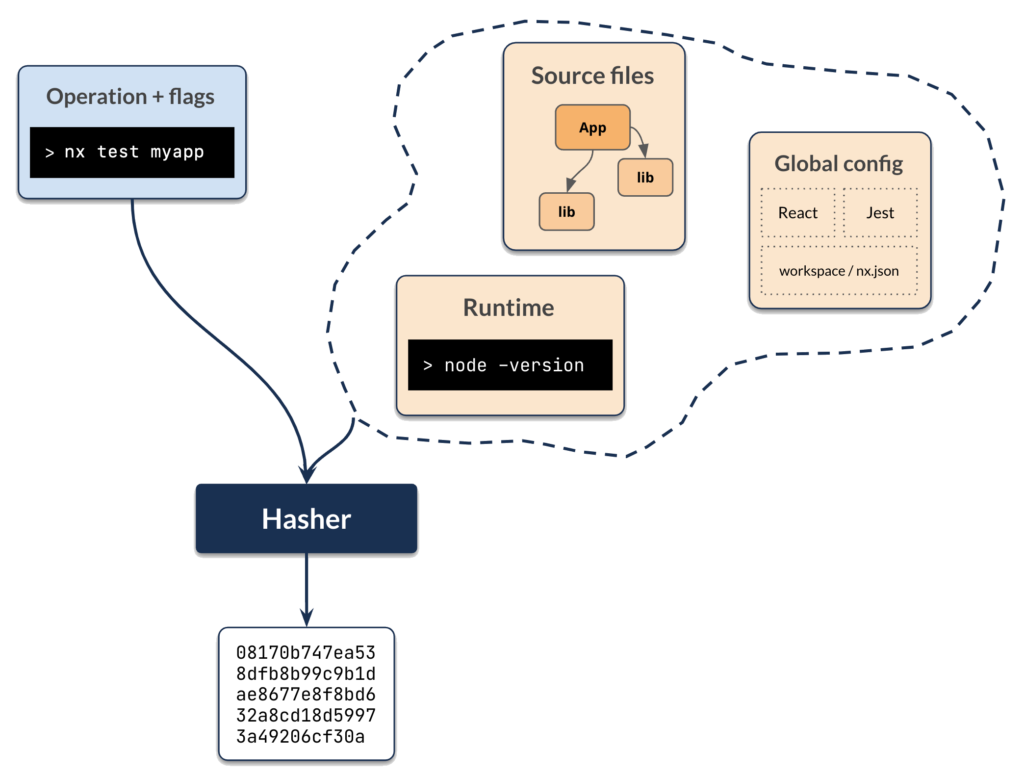
    另外,配合 nx 的共享缓存,这个项目的所有贡献者、CI 流水线,都可以享受到预打包带来的提升。

    为啥不能用 UMD 格式提供 pre-bundle ?

    rollup 不支持为 umd bundle 生成 common shared chunk

  • 给 Email 写样式真的很难

    虽然 IE 退出了浏览器的历史舞台,但是 Windows 平台上的 Outlook 依然继承了 IE 的衣钵,继续在邮件客户端界发光发热。

    This ranks email clients based on their support among the 298 HTML and CSS features listed on Can I email.

    最好用内联样式

    很多情况下,使用外部样式表并不靠谱,比如 GMail 以及 Outlook 就会在特定情况下移除邮件 HTML 中的 style 标签,一个更保守的做法是使用元素上的内联样式。对于简单的通知邮件来说,完全够用了。

    如果嫌手搓样式很麻烦,可以先用 TailWind CSS 编写,然后让 ChatGPT 帮忙转换成内联样式。

    避免使用 base64 内联图片

    虽然 Base64 图片 URL 很简单易用,但是很多邮件客户端会把它们当作外部图片一样默认屏蔽。

    一个对展示效果更加友好的做法是通过 cid 引用内联图片,这时,图片会被作为邮件的附件一起发送给收件人,如果不希望正文图片被客户端识别为可下载的附件,则需要将附件的 Content-Disposition 设置为 inline,同时,还需要设置正确的 Content-Type

    Quick summary

    1. Inline only attachments: use multipart/related
    2. Non-inline only attachments: use multipart/mixed
    3. Inline and non-inline attachments use multipart/mixed and multipart/related
    mime – HTML-Email with inline attachments and non-inline attachments – Stack Overflow

    我的 Email 模板工作流

    考虑到 EMail HTML 本身的复杂性,为了简化 Email 模板的开发,我采用了下面的工作流:

    首先,使用 degit 初始化一个集成了 TailWind CSS 跟 Vite 的项目模板:

    npx degit kometolabs/vite-tailwind-nojs-starter email-template

    修改其中的 vite.config.mjs:

    import { resolve } from "path";
    import { defineConfig } from "vite";
    import { ViteImageOptimizer } from "vite-plugin-image-optimizer";
    
    function optimizeSvgPlugin() {
      if (!!process.env.OPTIMIZE_IMAGES) {
        return ViteImageOptimizer({
          svgo: {
            plugins: [{ removeViewBox: false }, { removeDimensions: true }],
          },
        });
      }
    }
    
    export default defineConfig(() => ({
      build: {
        outDir: "../dist",
        emptyOutDir: true,
        // avoid inlining images
        assetsInlineLimit: () => false,
        rollupOptions: {
          input: {
            page1: resolve(__dirname, "src", "page1.html"),
            page2: resolve(__dirname, "src", "page2.html"),
          },
          output: {
            // avoid hash in assets filename
            assetFileNames: (assetInfo) => {
              const info = assetInfo.name.split(".");
              let extType = info[info.length - 1];
    
              // Explicitly handle image files
              if (/png|jpe?g|svg|gif|tiff|bmp|ico/i.test(extType)) {
                extType = "img";
                // Return the original filename without hashing
                return `assets/${extType}/[name][extname]`;
              }
    
              // For other asset types, you can keep the default hashing behavior
              return `assets/${extType}/[name]-[hash][extname]`;
            },
          },
        },
      },
      root: "src",
      plugins: [optimizeSvgPlugin()],
    }));

    在编写 HTML 时需要手动创建一个引入 TailWind CSS 的 style 标签:

    <style>
    @tailwind base;
    @tailwind components;
    @tailwind utilities;
    </style>

    接下来就可以按照常规的方法用 HTML 画页面了,不过需要注意的是,大部分邮件客户端对 flex-box 的支持都比较差,在编写样式时需要注意。

    完成了 HTML 页面以及样式后,就可以借助 ChatGPT 将 TailWind 转换成内联样式的代码。最后,借助下面的脚本,即可将构建出来的 HTML 文件转换成 ejs 模板:

    // convert all `{{ foo }}` to `<%= foo %>`
    
    function convertToEjs(content: string) {
      return content.replace(/{{\s*(\w+?)\s*}}/g, "<%= $1 %>");
    }
    
    /**
     * Convert /assets/img/foo-bar.svg to cid:foo-bar
     * @param content
     */
    function toCidReference(content: string): string {
      return content.replace(/\/assets\/img\/([a-zA-Z0-9-)]+?)\.(svg|png|jpg|jpeg)/g, "cid:$1");
    }
    
    const files = await glob(dir + "/**/*.html");
    
    for (const filename of files) {
      const content = await fs.readFile(filename, "utf-8");
      const dirOfFile = path.dirname(filename);
      const newContent = toCidReference(convertToEjs(content));
      const newFilename = path.join(
        dirOfFile,
        path.basename(filename, ".html") + ".ejs",
      );
    
      await fs.writeFile(newFilename, newContent);
      echo(chalk.green(`Converted ${filename} to ${newFilename}`));
    }

    用来生成邮件模板的命令行操作如下:

    #!/usr/bin/bash
    OPTIMIZE_IMAGES=true yarn build
    cp ./dist/assets/img/* ./assets/img/
    npx tsx ./scripts/to-ejs-template.ts --dir ./dist

    参考链接

    How to Embed Images in Your Emails (CID, HTML Inline & More) | SendGrid

    mime – HTML-Email with inline attachments and non-inline attachments – Stack Overflow

  • 前端处理响应式图片

    MDN: Responsive images 介绍了在前端实现响应式图片的几种方法:

    • 为不同尺寸的屏幕加载不同大小的图片(srcset 配合 sizes
    • 固定图片大小,为不同 DPI 的屏幕加载不同 DPI 的图片(srcset
    • 为不同尺寸的屏幕加载不同的图片(picture 配合多个 source

    WordPress 采用 srcset/sizes 方案实现响应式图片,默认的设置为 sizes="(max-width: {{image-width}}px) 100vw, {{image-width}}px"。当页面宽度小于图片原始宽度时,以页面宽度(100vw)作为图片的显示宽度,当页面宽度大于图片宽度时,总会以图片原始宽度作为显示宽度。但实际上,不是所有的图片都会以原始宽度在页面上展示,由于排版样式的影响,图片的展示宽度往往跟原始宽度不一致。

    为了解决这个问题,需要使用 Enhanced Responsive Images 插件,这个插件会基于当前主题的 Content Width, Wide Width 为图片元素设置 srcset/sizes,相较于默认的实现,可以为大屏设备在图片宽度小于窗口宽度时提供更加合适的缩略图尺寸。

    Performance Lab 提供的 Enhanced Responsive Images 插件

    启用后的效果如下图:

    可以看到,虽然 img 元素的大小只有 800×312 px,但是浏览器选择了展示原图(1341 x 523 px),这是因为我的屏幕启用了 HiDPI,1 css px 约等于 2 显示器 px,这种情况下,浏览器使用更大尺寸的图片是合理的。

  • 使用 cloudflare tunnel 在线上预览本地的开发服务器

    Cloudflare Tunnel 是一项服务,允许开发者将其本地开发服务器通过安全的隧道连接到 Cloudflare 的服务器,并发布到互联网上。这意味着:

    1. 其他人可以直接通过互联网访问你本机的开发服务器
    2. 本地的 HTTP 服务可以自动获得由 Cloudflare 提供的 https 证书

    Cloudflare 在这篇文章中介绍了如何将本地项目发布到互联网,但是对于前端开发服务器的场景来说,缺少一些必要的配置说明,例如,稳定的域名、网页缓存策略等。如果你遇到了开发服务器通过 Cloudflare tunnel 访问后出现了一些诡异的问题,不妨参考下面的步骤来检查一下自己的配置。

    创建本地管理的 tunnel

    在开始之前,请确保你准备好了这些东西:

    • 在本地安装 cloudflared
    • 在 cloudflare 上绑定了自己的域名

    接着,参考这里的说明,创建一个本地管理的 tunnel。完成这里的步骤后,你应该会得到一份 config.yaml 文件,默认存储在 ~/.cloudflared 目录下。

    Cloudflare 的文档中使用了 url 字段配置反向代理,但我建议使用下面的 ingress 配置,这样你可以在同一个配置文件中声明多个服务。

    tunnel: <Tunnel ID>
    credentials-file: /path/to/<Tunnel ID>.json
    
    ingress:
      - hostname: ng-serve.zeeko.dev
        path: /api/.*
        service: http://localhost:3000
      - hostname: ng-serve.zeeko.dev
        service: http://localhost:4200
      # this is a required fallback rule
      - service: http_status:503

    禁用 Cloudfare 缓存

    你的 Cloudflare 帐户很可能默认开启了请求缓存功能,在一些使用场景下,例如,webpack dev server,这个自带的缓存功能会让 dev server 变得很鬼畜,我们需要手动在 Cloudflare 控制面板禁用缓存。

    添加 webpack dev server 白名单

    如果你在使用 webpack dev server,记得把绑定的域名添加到 allowedHosts 中,避免 HMR 失败。

  • 给大代码库的类型检查提速

    这是一系列博文中的一篇,用来记录将我将公司的前端项目改造为 monorepo 的过程。

    4 / 4 of Nx Monorepo Experience

    当代码库达到一定规模后,在每次提交前进行完整的 TypeScript 类型检查会非常耗时,就像下面的代码库,执行完整的检查需要 47s,如果每次代码提交时执行类型检查,开发者都得等上接近 1 分钟才能完成 git commit,极大的拉低了开发体验。

    ───────────────────────────────────────────────────────────────────────────────
    Language                 Files     Lines   Blanks  Comments     Code Complexity
    ───────────────────────────────────────────────────────────────────────────────
    TypeScript                3721    271374    23335     21340   226699      16639
    
     nx run-many -t check --all
    
          nx run icons:check (3s)
          nx run visual:check (4s)
          nx run eslint-plugin-merico:check (4s)
          nx run vdev-api:check (176ms)
          nx run nx-plugin:check (3s)
          nx run illustrations:check (4s)
          nx run shared-lib_temp:check (4s)
          nx run fekit:check (12s)
          nx run charts:check (14s)
          nx run main:check (39s)
    
     —————————————————————————————
    
     >  NX   Successfully ran target check for 10 projects (47s)
    

    那么为什么会这么慢呢?责任真的全在 nodejs 的性能上?

    为什么这么慢

    TypeScript 文档中这样写道:

    Rather than doing a full check of all d.ts files, TypeScript will type check the code you specifically refer to in your app’s source code.

    所以当你的 monorepo 中存在项目间引用的时候,执行 tsc -p lib-bob/tsconfig.json 会同时在 lib-bob 及其依赖的 lib-alice 上运行类型检查,这意味着,如果你在 monorepo 中对所有项目分别执行 tsc -p xx/tsconfig.json,被其他项目依赖的项目,会被重复检查多次!

    为了避免这种问题,TypeScript 的 build mode 提供了一种基于增量构建的解决方案。启用 build mode 后,庞大的代码库可以被拆分成多个项目分别被 tsc 构建,tsc 会缓存每个项目的构建结果,当一个项目被其他项目引用的时候,这个项目不会被重新构建而是使用之前的构建结果。在后续的执行中,只有发生变动的项目才会被重新构建。

    如何配置 build mode

    启用 build mode 的方法比较简单,你只需要调整 tsconfig.json 中以下几个选项即可:

    • compilerOptions.composite: true,用来标记这个项目可以被增量构建
    • compilerOptions.noEmit: false,启用增量构建必须允许 tsc 生成文件
    • compilerOptions.outDir: path/to/tsc-out,设置生成文件(包括缓存文件)的路径,记得加入 gitignore
    • compilerOptions.emitDeclarationOnly: true,如果你使用 tsc 构建 js 文件,可以不设置这个选项
    • references,把依赖项目的 tsconfig 路径添加到这里,让 tsc 可以使用这些依赖项目的构建缓存
    • compilerOptions.rootDir,不建议设置,避免构建缓存生成到 outDir 目录之外

    现在,你就可以使用 tsc -b (注意,不是 tsc -p) 来构建你的项目了,同样还是开头展示的代码库,现在重新运行类型检查:

     time nx run-many -t check --all --skip-nx-cache
    
          nx run illustrations:check (3s)
          nx run icons:check (5s)
          nx run visual:check (5s)
          nx run shared-lib_temp:check (781ms)
          nx run vdev-api:check (5s)
          nx run eslint-plugin-merico:check (832ms)
          nx run nx-plugin:check (2s)
          nx run fekit:check (10s)
          nx run fekit-e2e:check (2s)
          nx run charts:check (12s)
          nx run main:check (27s)
    
     ——————————————————————————————
    
     >  NX   Successfully ran target check for 11 projects (44s)
    
    
    ________________________________________________________
    Executed in   44.50 secs    fish           external
       usr time  119.40 secs  213.00 micros  119.40 secs
       sys time    6.17 secs   67.00 micros    6.17 secs 
    

    看起来似乎长进不大,再运行一遍试试?

     time nx run-many -t check --all --skip-nx-cache
    
          nx run illustrations:check (752ms)
          nx run visual:check (760ms)
          nx run icons:check (768ms)
          nx run shared-lib_temp:check (732ms)
          nx run fekit:check (880ms)
          nx run vdev-api:check (1s)
          nx run eslint-plugin-merico:check (731ms)
          nx run charts:check (900ms)
          nx run nx-plugin:check (756ms)
          nx run fekit-e2e:check (773ms)
          nx run main:check (1s)
    
     —————————————————————————————
     >  NX   Successfully ran target check for 11 projects (4s)
     
    
    ________________________________________________________
    Executed in    4.49 secs    fish           external
       usr time   13.51 secs    0.00 micros   13.51 secs
       sys time    1.86 secs  369.00 micros    1.86 secs
    

    类型检查速度变得飞快,这是因为 tsc 复用了第一次生成的构建缓存。如果你这时检查 outDir,你就会发现除了 d.ts 之外,tsc 还生成了 tsbuildinfo 文件,这就是 tsc 用来判断是否可以复用 d.ts 的关键。

     ls dist/out-tsc/icons
    components  tsconfig.build.tsbuildinfo
    

    可以想象的是,在平常开发过程中,每个 commit 通常只会修改一小部分文件,如果我们把代码库中较大的项目(例如上面的 main 项目,代码量有 18w 行)进一步拆分,就可以更加充分地利用增量构建的特性,运行类型检查的范围就会更小,速度就会更快。

    维护 monorepo 中的项目依赖

    细粒度的拆分项目在提高类型检查速度的同时,又会带来一个新的问题,由开发者人工维护项目之间的 references 字段会变得很麻烦,而且容易出错。为了减少人工操作的负担,我开发了一个小工具 —— ts-sync-ref,它会分析项目的 monorepo 内依赖,进而更新 tsconfig.json 的 references 字段。

    # 安装 ts-sync-ref
    npm install -g @zeeko/ts-sync-ref
    # 更新 my-lib 的依赖到 tsconfig.json 中的 references 字段
    cd /path/to/my-monorepo
    ts-sync-ref -p packages/my-lib/tsconfig.json -f 'packages/my-lib/src/**/*.ts'
    

    你可以阅读 ts-sync-ref 的说明文档、代码,进一步了解使用方式及其实现原理。

    结论

    Monorepo 的组织方式有很多种,不管你在用什么工具管理你的 TypeScript monorepo,不妨试试通过 TypeScript 的 Project Reference 将大代码库拆分成多个项目,不仅可以提升类型检查、构建速度,还可以减少编辑器的内存占用,极大地提高开发体验。

    不过,需要注意的是,直接启用 Project Reference 可能会给你的项目带来一些影响,导致现有的构建脚本出错,例如:

    最后,如果你有兴趣的话,也欢迎你在评论区分享你的项目执行类型检查的方案。

  • 如何使用 nx 缓存构建产物

    这是一系列博文中的一篇,用来记录将我将公司的前端项目改造为 monorepo 的过程。

    3 / 4 of Nx Monorepo Experience

    There are only two hard things in Computer Science: cache invalidation and naming things.

    Phil Karlton

    nx 的缓存机制如何工作

    How Caching Works 这篇文章中非常详细地说明了 nx 缓存构建结果的机制:
    nx 会计算当前执行的 target 的 Hash 作为 cache key,在 target 执行完成后把构建输出(包括终端输出、构建结果文件)作为缓存内容存储起来。

    通过配置 project.json 中 target 的 inputs 选项,我们可以调整能够让缓存失效的文件、环境变量,具体的配置方法可以查看这里

    在编写文件 glob 模式的时候,有两个特殊的变量:

    • {projectRoot} :当前项目的根目录
    • {workspaceRoot}:nx 工作区的根目录

    然而不管是在 inputs 还是 outputs 配置中,路径都是相对于 workspace root 的,所以 {workspaceRoot} 变量基本上没啥作用。

    如何为项目添加构建缓存

    缓存失效一直都是计算机领域的一个难题,在配置 nx 构建缓存的时候,我有以下两点建议:

    • inputs 配置应该宁滥毋缺,因为缓存不同步的严重性远大于缓存命中率低
    • outputs 配置必须不多不少,避免无关文件被错误地覆盖或者构建结果缺失

    要做到上面两点需要精确地控制 inputs 跟 outputs 的文件匹配模式,这里推荐几种帮你减少工作量方法:

    在拆分模块需要注意,尽量采用类似 Module Federation 或者 Webpack DLLPlugin 等机制,这种构建方式能够真正实现分模块打包。如果没有采用类似的机制,所有的模块都会在入口模块处被重新处理,所以除了入口模块之外,其他的模块没必要 minify ,这样可以加快打包速度。

    共享缓存执行结果

    nx 缓存默认存储在本地,独乐乐不如众乐乐,通过添加 nx-remotecache-minio,我们可以把 nx 缓存存储在任意与 S3 兼容的对象存储服务器上。如此,只要项目中的任意一位成员甚至 CI 服务器构建过某个模块,其他人都可以跳过构建直接从远程服务器拉取构建结果。

    需要注意的是,nx-remotecache-minio 没有处理访问对象存储超时的情况,所以一旦遇到对象存储服务器不可用的情况,记得及时终止构建,并将 NX_CACHE_MINIO_URL 环境变量设置成一个无法解析的地址,避免构建命令卡住。

  • 拒绝重复劳动,自动为项目添加 target

    这是一系列博文中的一篇,用来记录将我将公司的前端项目改造为 monorepo 的过程。

    2 / 4 of Nx Monorepo Experience

    完成了自制的插件过后,我们得往需要使用 lingui 的项目中添加相关的 target,项目少还好说,项目一多,这就变成纯体力劳动了。还好, nx 提供了 Project Inference 机制,给插件加上几行代码,就可以让 nx 自动为项目添加合适的 target。

    与 executor 不同,project inference 功能需要在 nx.json 中注册:

    {
      "plugins": [
        "my-nx-plugin"
      ]
    }

    Project inference 功能由 my-nx-plugin 模块默认导出的两个变量来实现:

    • projectFilePatterns 主要用来识别项目文件,项目目录中匹配的文件会作为参数传递给 registerProjectTargets
    • registerProjectTargets 是一个用来根据项目文件推断 targets 的函数,它返回一个 Record<string, TargetConfiguration>,即我们在 project.json/targets 中编写的内容。

    一个给项目添加 lingui target 的实现如下:

    import { workspaceRoot } from '@nrwl/devkit';
    import * as path from 'path';  
    import * as fs from 'fs';
    import type { TargetConfiguration } from '@nrwl/devkit';
    
    export const projectFilePatterns = ['package.json'];
    
    export function registerProjectTargets(projectFilePath: string): Record<string, TargetConfiguration> {
     // 通过导入的 workspaceRoot 变量来获取当前 nx workspace 的根目录,这样可以将 projectFilePath 转换为绝对路径
     const projectRoot = path.join(workspaceRoot, path.dirname(projectFilePath));  
     return { 
       ...linguiTargets(projectRoot),  
     };  
    }
    
    function linguiTargets(projectRoot) {
      const packageJSON = fs.readFileSync(path.join(projectRoot, 'package.json'), 'utf8');
      // 只要项目依赖了 lingui,就给它添加 lingui target
      if (packageJSON.indexOf('lingui') > 0) {
        return {
          lingui: {
            executor: 'nx-plugin:lingui',
            options: {
              locales: path.join(projectRoot, 'locales'),
            }
          }
        }
      }
    }

    在实现这个功能的时候需要注意几点 registerProjectTargets 必须是个同步函数,所以不能使用任何异步 API,也没法用之前提到的方法来引用 ESM。另外,nx 出于性能考量,会缓存 registerProjectTargets 的结果,所以在 Debug 的时候,一定要记得设置环境变量 NX_CACHE_PROJECT_GRAPH=false

    在处理文件路径的时候,建议尽量使用绝对路径,使用相对路径需要思考是相对于 workspace root 还是 cwd,用绝对路径可以减少这方面的心智负担。

    虽然功能实现了,但是现在还不能立马使用,需要将插件源码转译成 CJS 代码。前面的文章提到过用 postinstall 来编译自定义 nx 插件,在实现了今天的功能后,编译自定义插件的命令必须不能用 nx 来执行,因为 nx 执行任何命令都会加载插件模块,如果我们的插件没有编译成 CJS,通过 nx 调用的编译插件命令也会失败。

    Project Inference 功能非常强大,可以很大地减少我们维护项目 targets 的负担,在我看来,这算得上 nx 的旗舰功能了,后面我也会再演示一些其他使用 Project Reference 的典型场景。